Posts

Showing posts with the label macos

Convert e-books to txt

Image
If you want to convert e-books to plain text ( txt ) on linux or other Unix-like systems, here are some command-line utilities that you can use along with their terminal commands: File type Text conversion utilities Examples .djvu 1. djvutxt 2. ebook-convert 1. djvutxt input.djvu output.txt 2. ebook-convert input.djvu output.txt .epub 1. epub2txt 2.  ebook-convert 3. unzip 1. epub2txt  input.epub > output.txt 2. ebook-convert input.epub output.txt 3.  unzip  -c input.epub > output.txt .doc 1. catdoc 2. textutil  (macOS) 3.  ebook-convert 1. catdoc input.doc > output.txt 2. textutil -convert txt input.doc -output output.txt 3. ebook-convert input.doc output.txt .pdf 1. pdftotext 2.  ebook-convert 1. pdftotext input.pdf output.txt 2. ebook-convert input.pdf output.txt NOTES: There is a caveat for  unzip : the generated output file will also include HTML tag
UnicodeEncodeError: 'ascii' codec can't encode character

Image
UnicodeEncodeError : 'ascii' codec can 't encode character ' \ U0001f6d1 ' in position 2: ordinal not in range(128) This Python error might happen if you are having problems displaying non-ASCII characters in your terminal when running a Python script. This is mainly a problem with your locale settings used by your terminal. I provide two solutions to resolve it: Solution #1 : change your locale settings (best solution) Solution #2 : export  PYTHONIOENCODING=utf8  (temporary solution) Solution #1: change your locale settings (best solution) The best solution consists in fixing your locale settings since it is permanent and you don’t have to change any Python code. Append ~/.bashrc  or  ~/.bash_profile  with: export LANG = "en_US.UTF-8" export LANGUAGE = "en_US:en" You should provide your own UTF-8 based locale settings. The example uses the English (US) locale with the encoding UTF-8 . The locale -a  comma

Using pynput on macOS

Image
While working on my personal project Darth-Vader-RPi , I used the Python package pynput for monitoring the keyboard as to simulate push buttons on a Raspberry Pi. However, some keyboard keys were not detected on macOS without running the script with sudo (after adding PYTHONPATH to etc/sudoers ).  The keyboard keys that didn't need sudo were the following: alt keys cmd keys ctrl keys media buttons for play, pause, volume up/down/mute shift keys The other keyboard keys (all the alphanumeric and some special keys such as backspace and right) required the Python script to run with sudo . The pynput documentation explains the modifications you should apply to your application if you want to make it run on Linux, macOS, or Windows. Image credit:   "Apple Key"  by  Antijingoist  is licensed under  CC BY-NC-ND 2.0

A Raspberry Pi project about activating Darth Vader with LEDs and sounds

Image
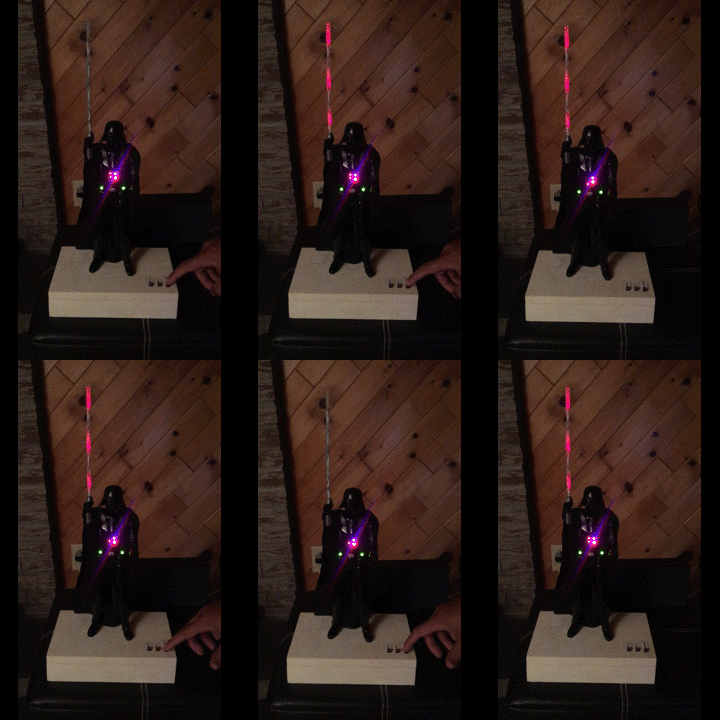
Darth-Vader-RPi is a Python-based Raspberry Pi (RPi) project about activating a Darth Vader action figure by turning on LEDs on his suit and lightsaber, and by playing sounds such as some of his famous quotes. Click on the gif to play the video The Darth Vader action figure is 11.5 inches tall (which is this one from Hasbro ) and was modified to make it more lifelike by illuminating the lightsaber, chest control box, and belt. 3 push buttons control the following sounds and LEDs: Some of his famous quotes The Imperial march theme song The lightsaber opening and retraction sounds The lightbsaber illumination (3 LEDs) His iconic breathing sound plays in the background indefinitely as soon as the RPi is run with the start_dv   script. Connection diagram Here’s how the various LEDs and push buttons are connected to the Raspberry Pi: The lightsaber is illuminated by 3 LEDs connected in parallel. The Top , Middle , and Bottom LEDs illuminate the slots in Darth Vader's chest control

Introducing the Python library SimulRPi

Image
SimulRPi is a Python library that I wrote as part of my Darth-Vader-RPi  project. It partly fakes RPi.GPIO and simulates some I/O devices connected to a Raspberry Pi (RPi): push buttons by listening to pressed keyboard keys and LEDs by displaying blinking red dots in the terminal along with their GPIO pin numbers. The Python package pynput is used to monitor the keyboard for any pressed key. Thus, the SimulRPi library can be useful in the case that you want to try your  RPi.GPIO -based script by running it on your computer when no RPi is available at the moment. Example: terminal output Simulating LEDs on an RPi via a terminal Each dot represents a blinking LED connected to an RPi and the number between brackets is the associated GPIO channel number. Here the LED on channel 22 toggles between on and off when a key is pressed. Dependencies Platforms:  Linux, macOS Python:  3.5, 3.6, 3.7, 3.8  pynput >=1.6.8: for monitoring the keyboard for any pressed key  Installation instructi

Modify DocumentRoot in Apache (Mac)

After you've installed Apache with Homebrew on macOS , you might want to change the DocumentRoot which points to the directory where your website resources reside (e.g. HTML, CSS, images). By default, DocumentRoot is located in /usr/local/var/www 1 . Here are the steps to follow to change DocumentRoot to map to a custom directory path: Place your website folder to the desired place. For example: /usr/local/var/www/my_website Open the file /usr/local/etc/httpd/httpd.conf with your favorite editor, search for DocumentRoot , and modify the following line by substituting your directory path within the double quotes: DocumentRoot "/your/directory/path" Also change the next line: <Directory "/your/directory/path"> Restart your Apache server (if you want Apache to restart at login): $ sudo brew services restart httpd or if you don't want Apache to run as a background service: $ sudo apachectl restart Test the changes to DocumentRo

Install the MAMP (Mac, Apache, MySQL, PHP) stack

Image
There are two ways that you could install ( freely ) the whole MAMP stack: installing the MAMP (version 4.5) software bundle is the easiest way since it is a one-click-solution for setting up a personal webserver install each components (Apache, MySQL, and PHP) separately. This second method consists in installing Apache and PHP with Homebrew, and MySQL with the  package Installer . It is the hardest method but it enables you more control over the installation process, e.g you can install specific versions of each components, or install extra PHP extensions. NOTE:  MAMP 4.5, Apache 2.4.33, MySQL 8.0.11, PHP 7.2.7, and phpMyAdmin 4.8.2 are installed in the following tutorial Contents 1. Method 1: install the MAMP software bundle 2. Method 2: install each components (Apache, MySQL, and PHP) separately      2.1 Apache+PHP           2.1.1 Install Apache+PHP           2.1.2  Change Apache's default ports           2.1.3  Start the Apache server           2.1

Make a movie from a sequence of images (Mac)

Image
There are two tools I tried on a  Mac to generate a movie from a sequence of jpg images: iMovie : very complete video editor, i.e. lots of interesting features such as adding sound to your video, titles and transitions. Works on jpg and png files. However, the video encoding is a slow process if applied on too many images (e.g. more than 1000). Official website . I tested with version 10.1.8 Time Lapse Assembler : very simple interface, i.e. a lot less features than iMovie.  Works on jpg files only. Great if you are only interested in generating a simple movie from a sequence of images without adding sound, titles, or transitions to your video. Application works great when applying it on lots of images (e.g. more than 1000). Official website . I tested with version 1.5.3 Contents    1. Mini-review #1: iMovie    2. Mini-review #2: Time Lapse Assembler    3.  Use case: Time Lapse Assembler applied to security camera images Mini-review #1: iMovie When using iMovie, i

Make a split screen movie with iMovie and OpenShot (Mac)

Image
There are two tools I tested to make a split screen movie on a Mac: iMovie: video editor from Apple, official website . I tested with  version 10.1.8 OpenShot:  free and open source video editing software that works on FreeBSD/Linux/macOS/Windows, official website . I tested with version 2.4.1 Contents     1. Split screen layout selected     2. iMovie         2.1 Steps to make a split screen movie with iMovie     3. OpenShot         3.1 Steps to make a split screen movie with OpenShot Split screen layout selected More specifically, I wanted to create a split screen movie with the following layout having a 16:9 aspect ratio: Figure 1. Split screen layout: Movie 3 should take the right half of the screen My basic motion detection system generates 3 videos, and I wanted to combine them in a single movie for better visualization. Movie 3 should take the right half of the screen because it is the most important video of the three: it tracks the moving objects