Posts

Showing posts with the label python3

NLP in action: train a Naive Bayes model on movie reviews

Image
In the book Natural Language Processing in Action , section 2.3.2 Naive Bayes , we train a multinomial Naive Bayes classifier on movie reviews using scikit-learn 's  MultinomialNB .   NOTE:  I am using numpy 1.19.1, pandas 1.1.3, and scikit-learn 0.23.2 However, we get a ValueError when transforming the predicted probabilities in the [-4, 4] range as done in the book: nb = MultinomialNB () nb = nb . fit ( df_bows , movies . sentiment > 0 ) movies [ 'predicted_sentiment' ] = nb . predict_proba ( df_bows ) * 8 - 4 ValueError: Wrong number of items passed 2, placement implies 1 The reason is that nb.predict_proba() returns a numpy array with two columns and we are trying to assign it to a single column from the Pandas table  movies  (which I believe you could do in previous Pandas versions; I am using Pandas version 1.1.3) : array ([[ 1.86060657e-01 , 8.13939343e-01 ], [ 1.19745717e-05 , 9.99988025e-01 ]...

Using pynput on macOS

Image
While working on my personal project Darth-Vader-RPi , I used the Python package pynput for monitoring the keyboard as to simulate push buttons on a Raspberry Pi. However, some keyboard keys were not detected on macOS without running the script with sudo (after adding PYTHONPATH to etc/sudoers ).  The keyboard keys that didn't need sudo were the following: alt keys cmd keys ctrl keys media buttons for play, pause, volume up/down/mute shift keys The other keyboard keys (all the alphanumeric and some special keys such as backspace and right) required the Python script to run with sudo . The pynput documentation explains the modifications you should apply to your application if you want to make it run on Linux, macOS, or Windows. Image credit:   "Apple Key"  by  Antijingoist  is licensed under  CC BY-NC-ND 2.0

A Raspberry Pi project about activating Darth Vader with LEDs and sounds

Image
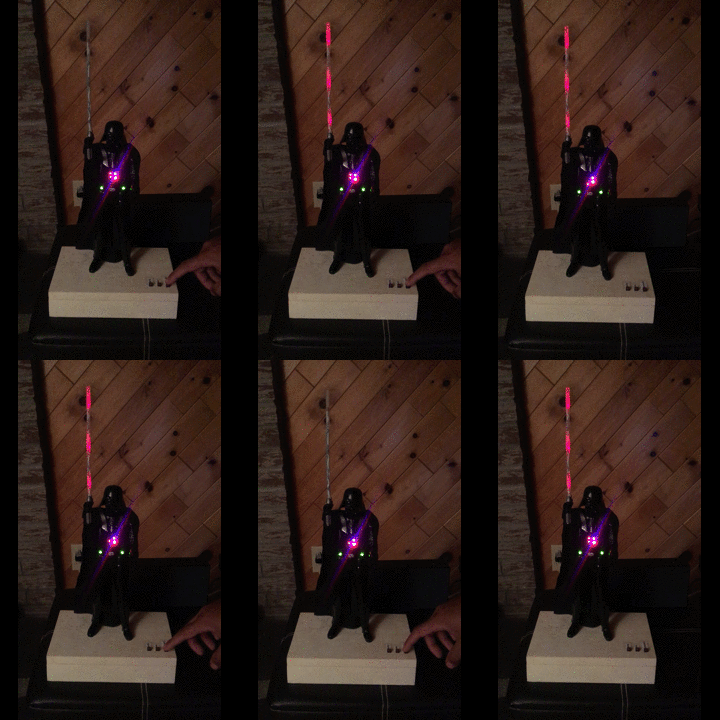
Darth-Vader-RPi is a Python-based Raspberry Pi (RPi) project about activating a Darth Vader action figure by turning on LEDs on his suit and lightsaber, and by playing sounds such as some of his famous quotes. Click on the gif to play the video The Darth Vader action figure is 11.5 inches tall (which is this one from Hasbro ) and was modified to make it more lifelike by illuminating the lightsaber, chest control box, and belt. 3 push buttons control the following sounds and LEDs: Some of his famous quotes The Imperial march theme song The lightsaber opening and retraction sounds The lightbsaber illumination (3 LEDs) His iconic breathing sound plays in the background indefinitely as soon as the RPi is run with the start_dv   script. Connection diagram Here’s how the various LEDs and push buttons are connected to the Raspberry Pi: The lightsaber is illuminated by 3 LEDs connected in parallel. The Top , Middle , and Bottom LEDs illuminate the slots in Darth Vader's chest control...

Introducing the Python library SimulRPi

Image
SimulRPi is a Python library that I wrote as part of my Darth-Vader-RPi  project. It partly fakes RPi.GPIO and simulates some I/O devices connected to a Raspberry Pi (RPi): push buttons by listening to pressed keyboard keys and LEDs by displaying blinking red dots in the terminal along with their GPIO pin numbers. The Python package pynput is used to monitor the keyboard for any pressed key. Thus, the SimulRPi library can be useful in the case that you want to try your  RPi.GPIO -based script by running it on your computer when no RPi is available at the moment. Example: terminal output Simulating LEDs on an RPi via a terminal Each dot represents a blinking LED connected to an RPi and the number between brackets is the associated GPIO channel number. Here the LED on channel 22 toggles between on and off when a key is pressed. Dependencies Platforms:  Linux, macOS Python:  3.5, 3.6, 3.7, 3.8  pynput >=1.6.8: for monitoring the keyboard for any pressed key...

NLTK: Text.collocations() returns ValueError

Image
Book cover from  amazon.co.uk I was trying the collocations examples from  Chapter 1 , section 3.3 Collocations and Bigrams , of the book NLP with Python and I got the following ValueError The solution came from this NLTK’s issue on their GitHub  : Open  .../nltk/text.py    with your favorite editor NOTE: in my case the file was in ~/miniconda3/envs/nlp_py37/lib/python3.7/site-packages/nltk/text.py Change lines 440 and 441 from .../nltk/text.py    with the following line: print (tokenwrap( self . collocation_list(num, window_size), separator = "; " )) Now the collocations examples are working: text4 . collocations(num = 21 ) text8 . collocations() Output: NOTE: you can play with the argument num which refers to the maximum number of collocations to print.

Python tips: reverse a dictionary

In Python, if you want to reverse a dictionary ( dict ), i.e. swap the keys and values, there are three methods that can help you achieve that goal depending on your needs: Method 1 : makes use of dict comprehension , and the dict must contain unique values Method 2 : makes use of dict.get() , and the dict doesn't contain unique values Method 3 : makes use of map(reversed, iter) , and you want the reverse dict to preserve the type and order of the original dict (if for example it is an OrderedDict ) I provided code implementations for each methods that work for Python 2.7.x and 3+, and the embedded code can be executed directly from the blog post through JDoodle , an online compiler and editor for many other languages (68 in total such as C/C++, Java, Go, SQL). I also compiled the average running times of the different methods in a table at the end ( Method 1 with dict comprehension is the fastest! Spoiler alert: Click to reveal winning method ) The code used ...

Installing OpenCV 3 on macOS with Homebrew

I am following this pyimagesearch tutorial to help me install OpenCV 3 on macOS Sierra 10.12.6 with Homebrew. I am using Python 2.7.15 & 3.6.4 installed with conda , instead of Python installed with Homebrew (like in the tutorial).  Contents    1. Major blog updates    2. Installation steps: Homebrew install command    3. cv2 import error    4.  Skipped brew tap    5.  --HEAD flag error    6.  Flags ignored: --with-contrib and --with-python3    7.  OpenCV installation test code    8.  SIFT and SURF test code Major blog updates May 29, 2018: added webcam test code + references, explained more the "sym-link" part, and added update of ~/.bash_profile Installation steps: Homebrew install command These were the prerequisites I had on my computer before installing OpenCV 3 via Homebrew: Operating system: macOS Sierra 10.12.6 Homebrew Two conda environm...